 This week will be the down and dirty, quick and easy steps to publishing your eBook on Amazon. Why Amazon? Because I’ve done it. (don’t know if you’ve noticed the ‘Books’ linky up there.) Why not any others? Because I haven’t… yet. (I plan to. Possibly.)
So… we’ve written our masterpiece (found our treasure), edited it within an inch of its life (polished it up nice and shiny), and now… we need to publish it (display it in a museum for all to enjoy). The first step is to make sure we have an Amazon account. (don’t have one? I’ll wait… the process is quite simple. AMAZON) Got one, now? Let’s move on.
Amazon has everything you need (including instructions if mine aren’t clear) over at Kindle Direct Publishing. Once over there, all you have to do is sign in with your Amazon account, and you’re ready to start the process to publish your book/story.
The first thing you need to worry about is the format of your book. I’ve hit upon the crazy amount of programs available to us to write our books… now, we have an insane amount of file formats to deal with, too. We’ll focus on TWO of them out of this list:
- Word (DOC or DOCX)
- HTML (ZIP, HTM, or HTML)
- MOBI (MOBI)
- ePub (EPUB)
- Rich Text Format (RTF)
- Plain Text (TXT)
- Adobe PDF (PDF)
- Kindle Package Format (KPF)
The two we’re going to look at… just happen to be the first two. Word and HTML.
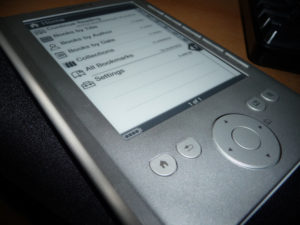
Word – KDP is pretty lenient with the doc/docx format. If you have some strange formatting and/or graphics… be careful. There is always a preview function that allows you to look at your eBook (on a multitude of Amazon/Apple products) before you publish. ALWAYS use this tool. You may not need it, but you don’t want to be surprised by a flood of emails from your readers wondering why you decided to have pages 163-192 upside down.
A few things to do with your Word document before uploading. Get rid of any page numbering. They don’t cross over to the eBook format, and for the most part… readers don’t care. Page counts are awesome for physical books where the font stays a constant size. With an e-reader… you can set up the things to display 10 words per page (which will confuse people when they get to page 32 and see: Page 2, at the bottom)
The next thing to focus on are page breaks. If you want your chapters to start on a new page, insert a page break. Do NOT hit return a few times until the next chapter bumps down to the next page… it’ll look ugly in your eBook.
Graphics (if you have any) MUST be added with the ‘insert’ command. DO NOT cut and paste! (That needs to be blinking and making noises) If you cut and paste your graphics into your Word document, you WILL get a headache. Fair warning! Moving on…
I’ve only bumped into a few problems with the doc/docx format when uploading my books, but enough that I stopped using it completely. So what do I use?
HTML – This seems to be the best way to have your book before uploading it. In each of the three that I’ve uploaded, I didn’t have a single problem when using the HTML format. The same caveats apply for the Word documents, though (whatever program you happen to be using)… you don’t need fancy fonts, sizes, page numbers… and use page breaks (the HTML will pass these on) if you need a new page.
The one big thing to remember when saving to HTML… if you have the option, use FILTERED HTML. If you’ve ever saved a document in Word as a regular HTML file, and looked at it in another editor, Office adds a crapload of excessive extra xml and html commands. By saving it in Filtered HTML, you remove all that extraneous code and keep it closer to the standard HTML commands that Amazon likes.
That’s it for today… tomorrow? the Cover!
(I do hope to run a test story through each of the file options above and run them through Amazon to see the results… I think it will be very scientific… and fun… to see how much each format differs with Amazon’s conversion process)
Editor’s Note: Looks like Scrivener has an export feature that’s supposed to work well with the KDP process. I haven’t tried it yet, but plan to when I publish my next book.

Leave a Reply